3pi Robot
Availability: Expected in Stock in 3 Days
Overview
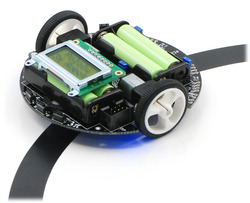 |
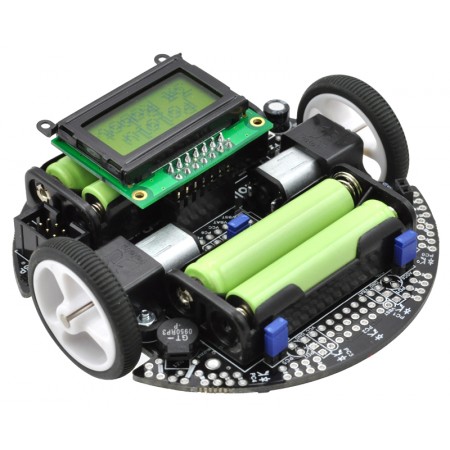
The 3pi robot is designed to excel in line-following and maze-solving competitions. It has a small size (9.5 cm/3.7" diameter, 83 g/2.9 oz without batteries) and takes just four AAA cells (not included), while a unique power system runs the motors at a constant 9.25 V independent of the battery charge level. The regulated voltage allows the 3pi to reach speeds up to 100 cm/second while making precise turns and spins that don’t vary with the battery voltage.
The 3pi robot makes a great platform for people with C programming experience to learn robotics, and it is a fun environment for ambitious beginners to learn C programming. At its heart is an Atmel ATmega328P microcontroller running at 20 MHz and featuring 32 KB of flash program memory, 2 KB RAM, and 1 KB of persistent EEPROM memory. The popular, free GNU C/C++ compiler works perfectly with the 3pi, Atmel Studio provides a comfortable development environment, and an extensive set of libraries provided by Pololu makes it a breeze to interface with all of the integrated hardware. The 3pi is also compatible with the popular Arduino development platform. Pololu provides a number of sample programs to show how to use the various 3pi components, as well as how to perform more complex behaviors such as line following and maze solving.
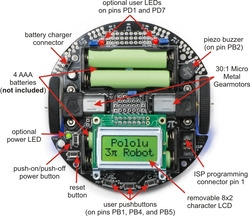
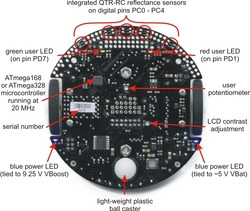
The diagrams below highlight the important features of the 3pi. Click on either picture for an expanded view.
|
|
|
For instructions on setting up and programming the 3pi, including sample code, contest ideas, and more, see the 3pi User’s Guide.
Required Accessories
An external AVR ISP programmer, such as our USB AVR programmer is required to program the 3pi.
The 3pi is powered by 4 AAA batteries, which are not included. We recommend rechargeable NiMH cells, which may be purchased from Pololu or at a local store carrying electronics. (We also carry a battery charger that works well with these NiMH cells and can be used to charge the batteries while they are still in the robot.)
Optional Accessories
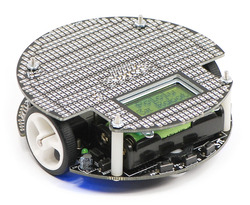
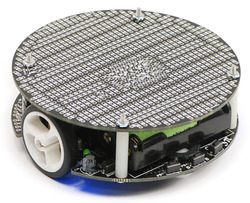
We currently offer three expansion kits for the 3pi that give you room to augment your 3pi with your own custom electronics. Two are basic kits that simply give your 3pi a second level (with prototyping space and key electrical connections to the 3pi base) to which you can add your own electronics. These basic expansion kits are available with black or red solder masks and with or without cutouts. The version with cutouts lets you view the LCD below and allows you to reach the power button, reset button, and ISP programming header on the base. The version without cutouts is a full circle that replaces the LCD, giving you access to more I/O lines and more prototyping space. The pictures below show the black versions of these two basic expansion kits.
|
|
The third option, the m3pi expansion kit, makes it easy to significantly upgrade the capabilities of your 3pi by converting it into an m3pi robot. This expansion board enables the use of ARM’s powerful 32-bit mbed development board as the robot’s high-level controller (mbed has an m3pi library that makes this easy), which offers significantly more processing power and free I/O lines than the 3pi’s built-in 8-bit AVR microcontroller. There are also sockets for Wixel and XBee wireless serial modules, prototyping space for additional sensors and electronics, eight more user-controllable LEDs, and more. If you already have a 3pi robot, you can use the m3pi expansion kit to upgrade it to an m3pi robot. Otherwise, you can get the m3pi robot directly, which includes a 3pi robot connected to a fully-assembled m3pi expansion board (no soldering is required). Please see the m3pi robot product page for more information.
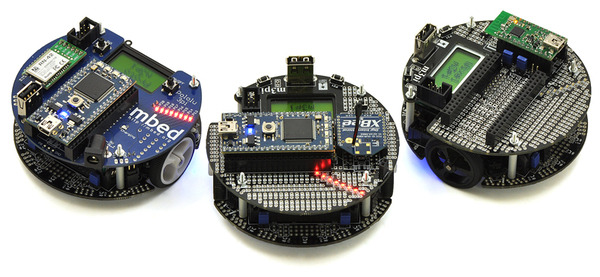 |
| A group of m3pi robots: ARM’s original m3pi (left) and Pololu’s m3pis (center and right). |
|---|
3pi Robot Video Gallery
The following videos from Pololu and our customers show some of the things you can do with the 3pi robot. The first video in the playlist introduces the 3pi’s basic features and operation.
The second video shows a 3pi prototype autonomously solving a line maze, first by exploring the maze and then by running the learned shortest path from start to finish, and the third video shows six 3pi prototypes simultaneously participating in a line-following exhibition at a local robotics competition (last one remaining on the line wins!). Please note the 3pis in the last few videos are using additional hardware for things like RC control and obstacle detection.
The above videos (with descriptions) and more can be found on our 3pi videos page. These videos show many more things that you can do with the 3pi, including RC control, following a laser pointer, wall following, solving looped mazes, and driving around line courses with kinks, gaps, and obstacles. Check out what some of our customers have done with this amazing little robot and get inspired!
|
|
Note: The 3pi robot currently ships with an LCD with a black bezel as shown in the main product picture, not the silver-bezeled LCD shown in some of the product photos and videos.
RobotSimple © 2025

 Robot and Robot Kit
 Robot Controller
 Servo Controller
 Motor Controller and Driver
 Computer Interface
 Sensors
 Arduino
 Arduino Shield and Accessories
 RC Interface
 Display
 Prototyping
 Voltage Regulator
 Miscellaneous
 Ball Casters
 Switches
 Servo
Servo LEDs
LEDs Headers